*This post contains affiliate links.
Hi everyone, it’s Twilife.
We’ve finally reached the very last part of our main living area (LDK) room tour.
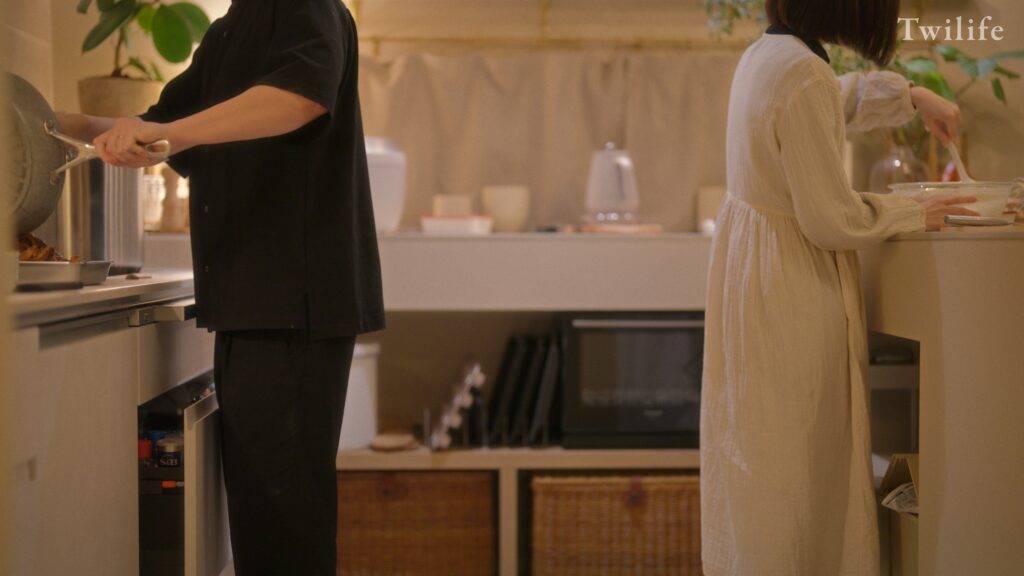
Since my husband and I both love to cook, this is the area we spent the most time obsessing over during our home build: the “Kitchen Area and Massive Pantry.”
\ Click here for the overall Room Tour /
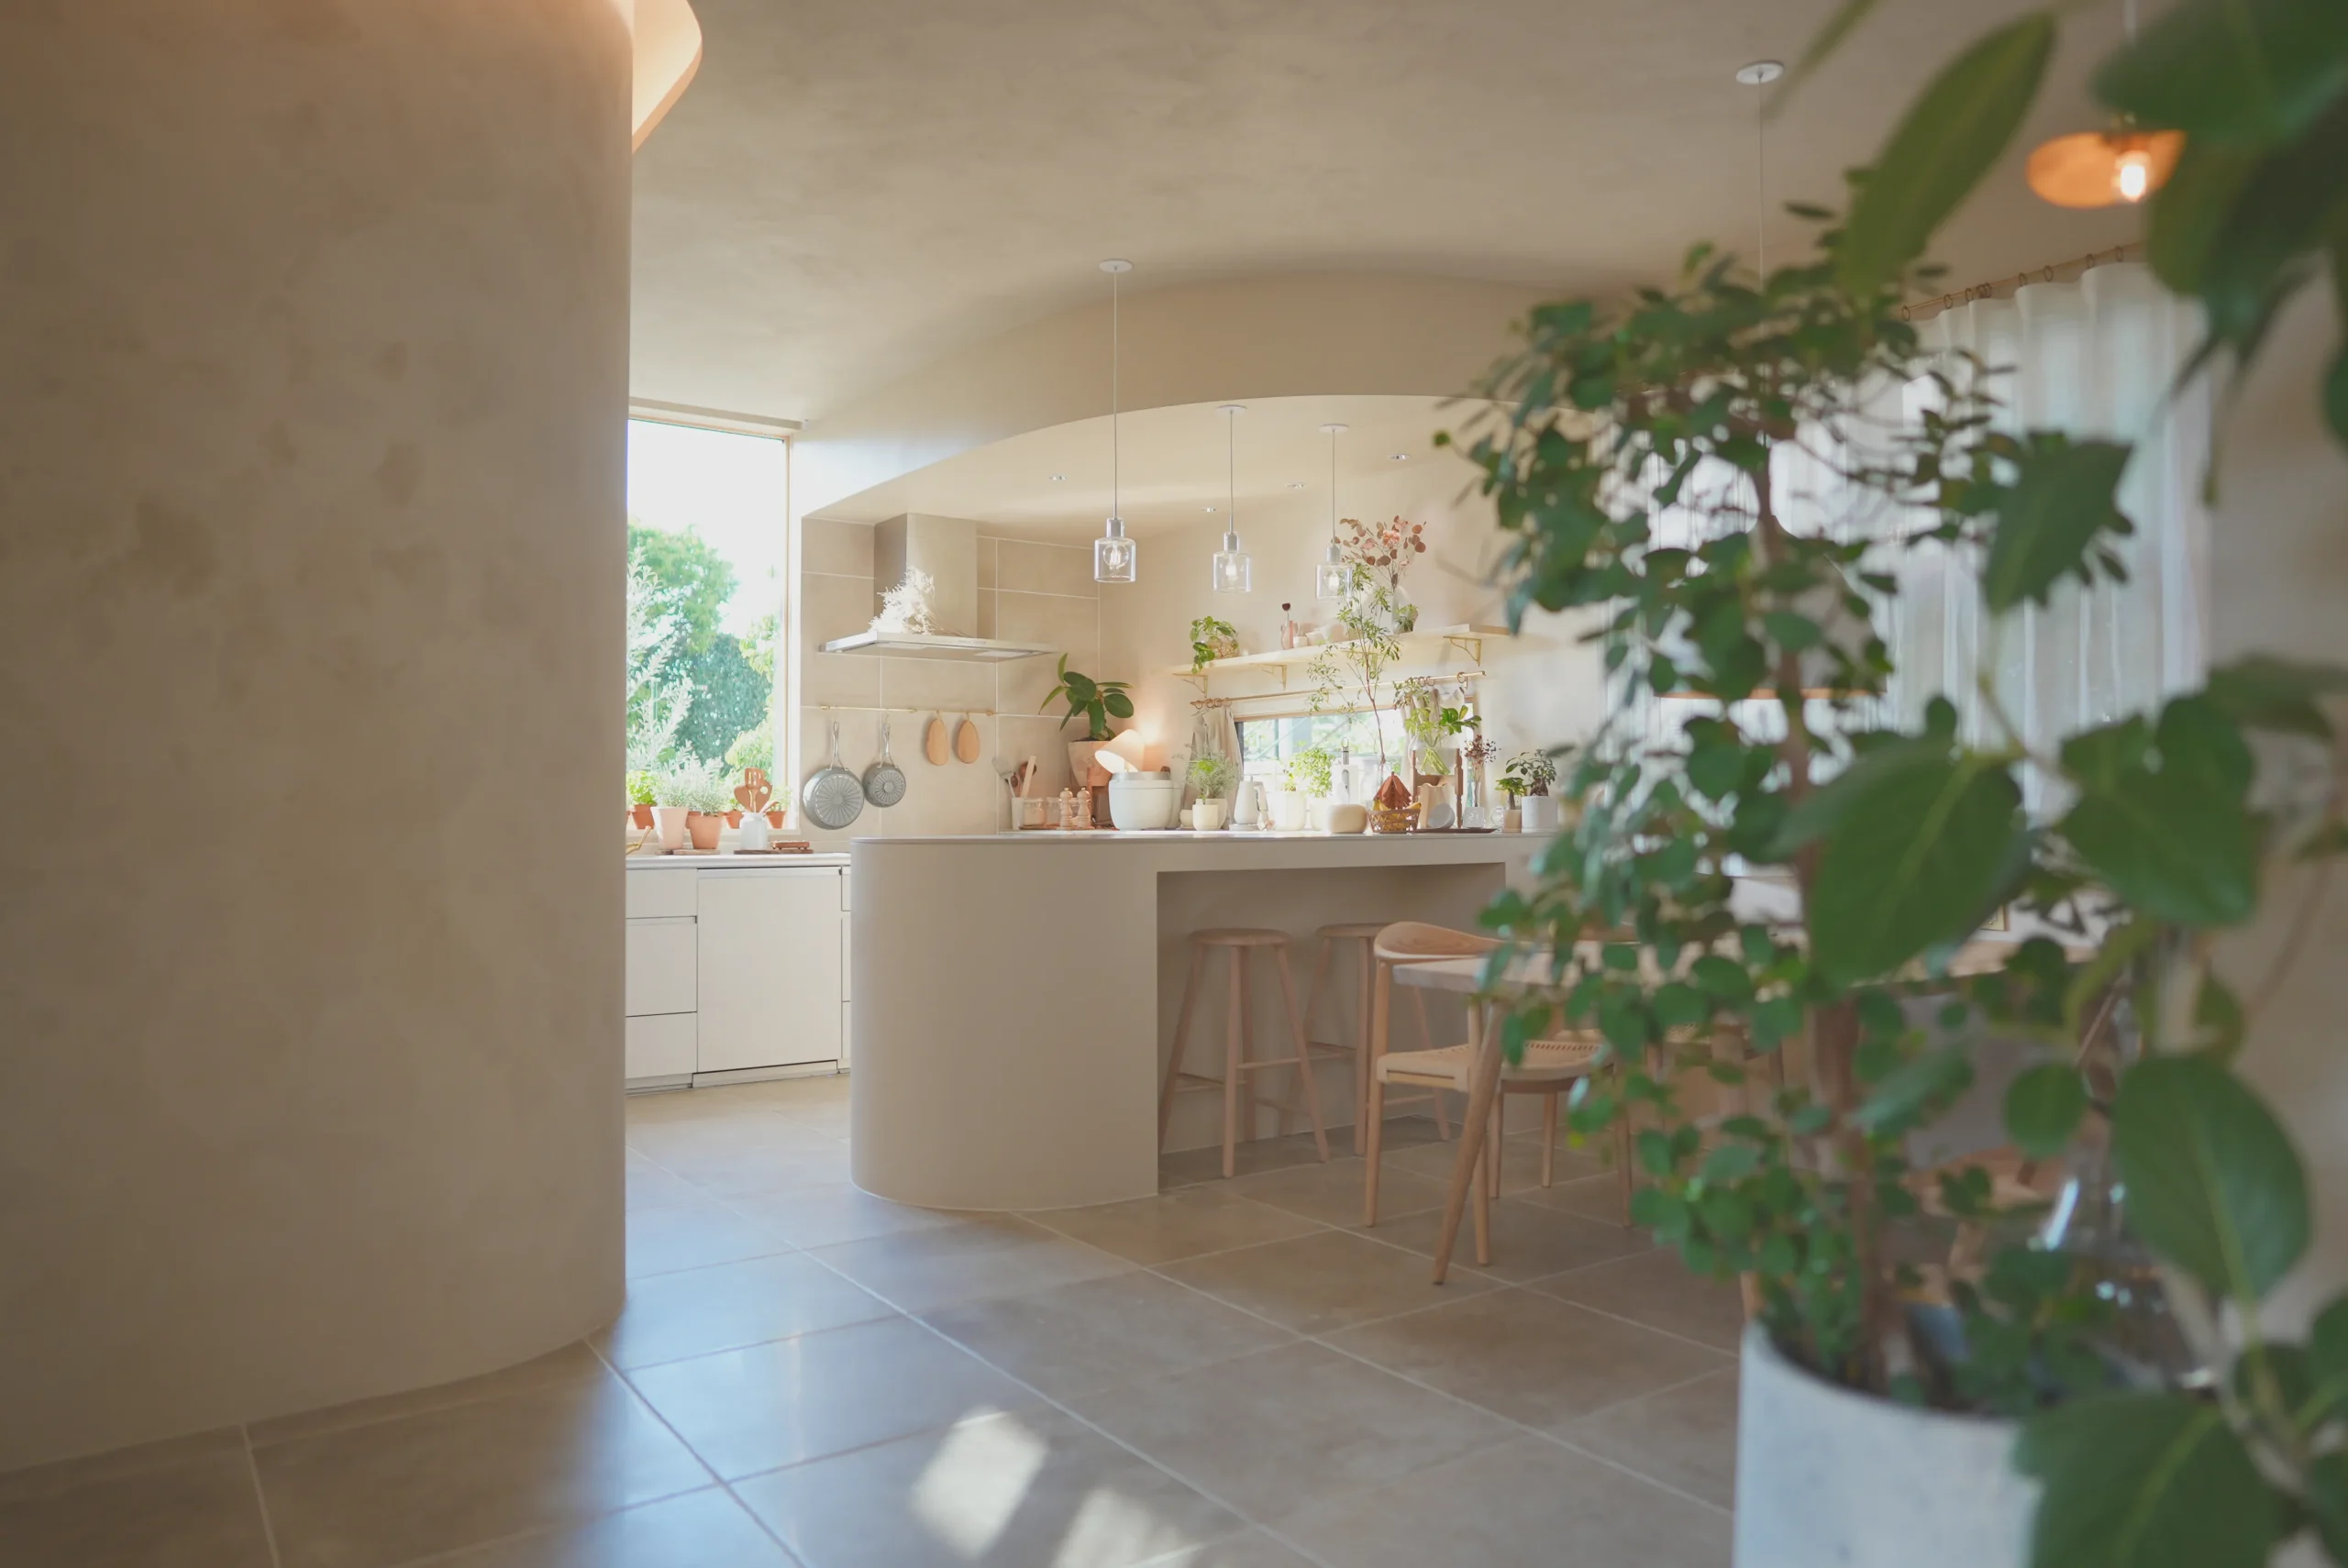
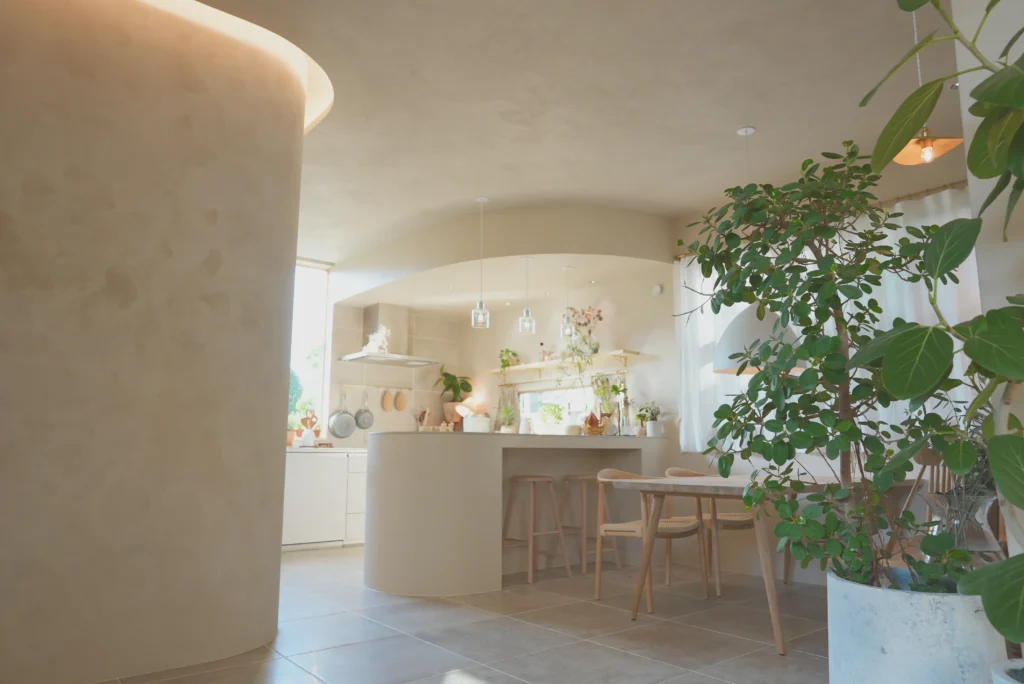
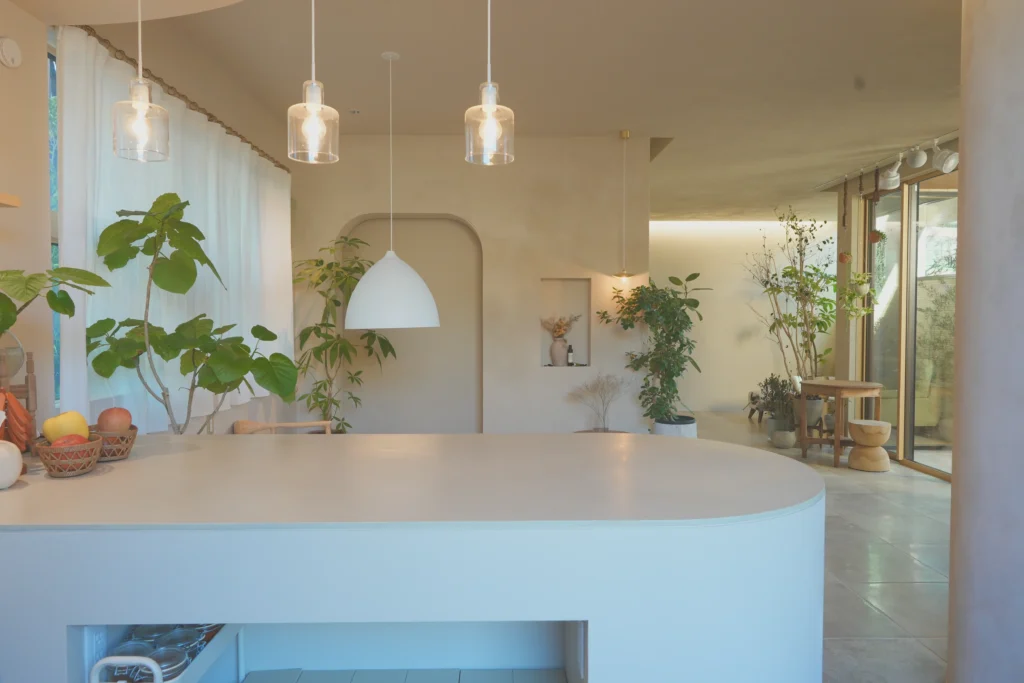
Our Dream U-Shaped Kitchen
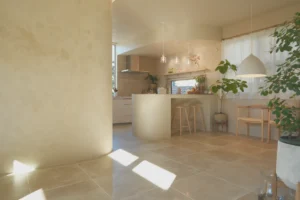
To soften the overall space, we designed a dropped ceiling above the kitchen that sweeps in a gentle curve.
Right next to it, we installed large, ceiling-height windows to bathe the area in bright, natural sunlight.
While our main living area relies heavily on indirect lighting, we made sure to place downlights specifically within this dropped ceiling so that chopping and prep work on the counter is never too dark.
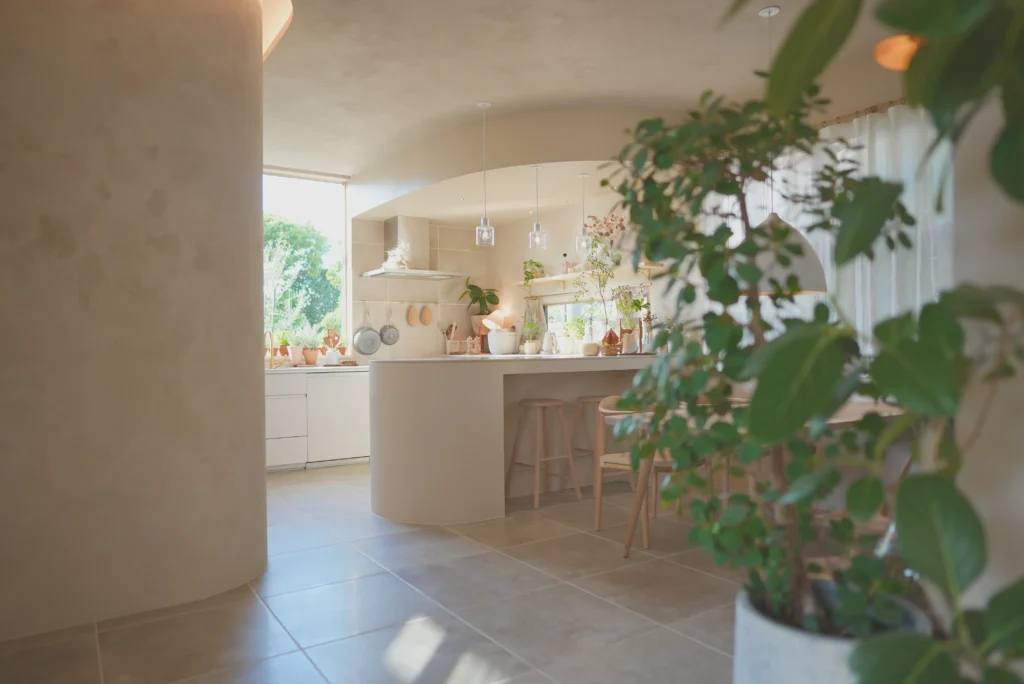
A Hybrid: Custom Build × L-Class Kitchen
I had always dreamed of that spacious “prep island and counter” vibe you often see when looking up overseas villas and resort hotels.
However, we couldn’t find our ideal shape and texture using only off-the-shelf modular kitchens, so we took the plunge and decided to create a “hybrid of a modular kitchen and custom carpentry.”
If you choose an “island” or “peninsula” layout for a modular kitchen, the price skyrockets because you have to finish all exposed sides with premium panels.
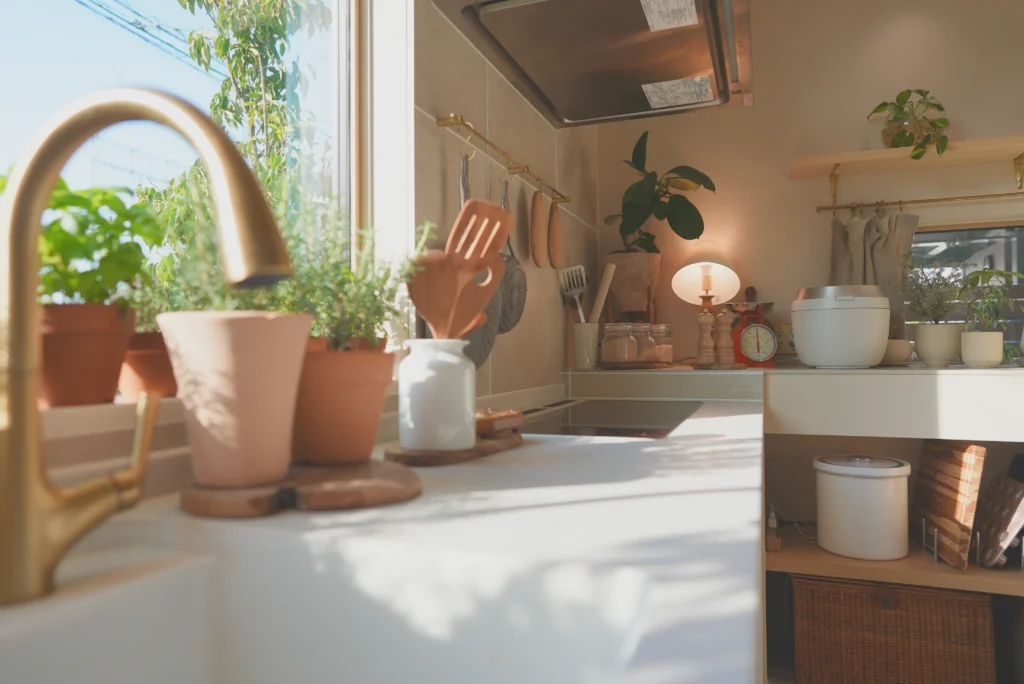
So instead, we intentionally ordered the Panasonic L-Class Kitchen as a standard “wall-facing layout,” and had our carpenters custom-build just the front counter section to create an overall “U-shape” design.
As a result, we were able to realize our ideal layout while keeping costs significantly lower than if we had tried to build a massive U-shape entirely out of modular kitchen parts.
I’ve detailed the specific features of our L-Class Kitchen (like the Triple Wide Induction Cooktop and front-open dishwasher) in a previous post, so be sure to check that out!
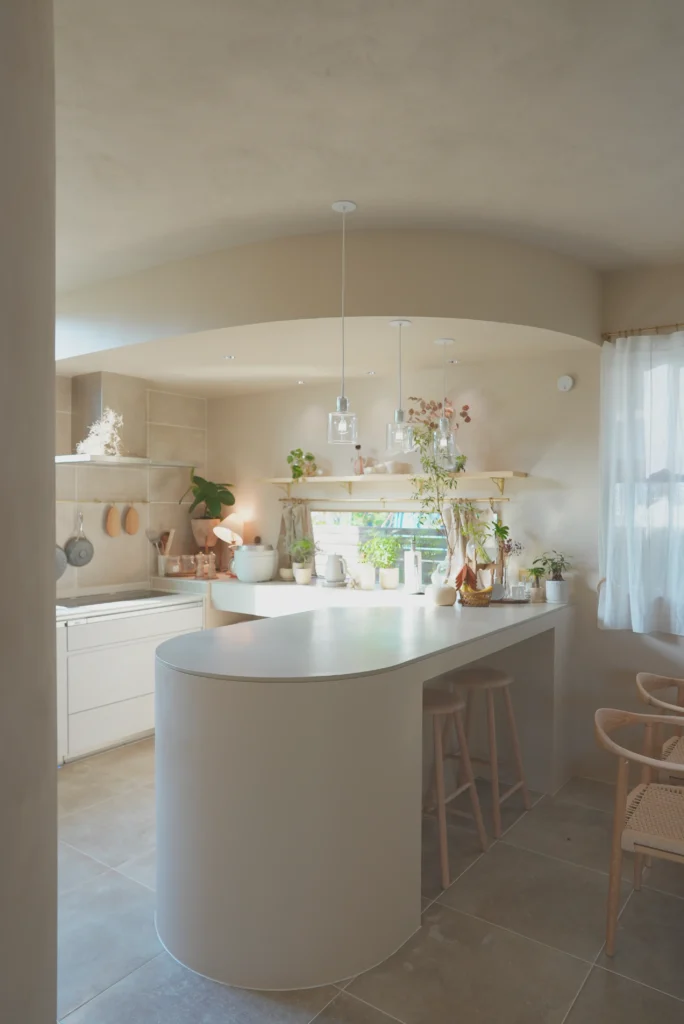
Countertops Finished with Artisan Plaster
For the countertop of our custom-built section, we used a plaster material called “Oltremateria.”
It’s known for its beautiful, low-gloss matte texture, and we had it custom-tinted to a delicate beige to match our walls.
As for the sides and the back of the counter, my husband and I DIY-painted them ourselves using Porter’s Paints.
When considering plaster for a custom kitchen counter, these three materials usually come up:
- Mortar: Affordable and loved for its rugged, industrial texture, but it easily absorbs water and stains, and is prone to cracking.
- Mortex: Highly resistant to cracking even when applied thinly, and boasts excellent waterproofing and durability. It has a beautiful, slightly glossy finish and has been incredibly popular recently.
- Oltremateria (What we used!): Offers the same high durability as Mortex, but allows for a more “matte, natural stone-like texture.” It’s also an eco-friendly material, which is a great bonus.

Instead of standard kitchen wall panels, we used the exact same tiles for the backsplash that we used in the living room and courtyard, unifying the texture across the entire living area. (Read more about our tile floors here)
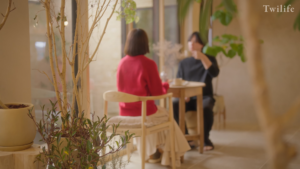
We placed two high stools at the front counter, creating a little bar-like space where my husband and I can sit side-by-side and enjoy a drink.
Generous Walkway & Plenty of Storage
The walkway inside a kitchen is typically designed to be around 80cm to 100cm wide.
However, we boldly decided to make ours a very spacious 1.4 meters (approx. 4.6 feet).
Thanks to this, there is absolutely zero stress when the two of us are cooking together and need to pass behind one another. It also prevents the space from feeling cramped even with large appliances lined up on the back counter. If you love cooking with family or friends, I highly recommend leaving extra space here!
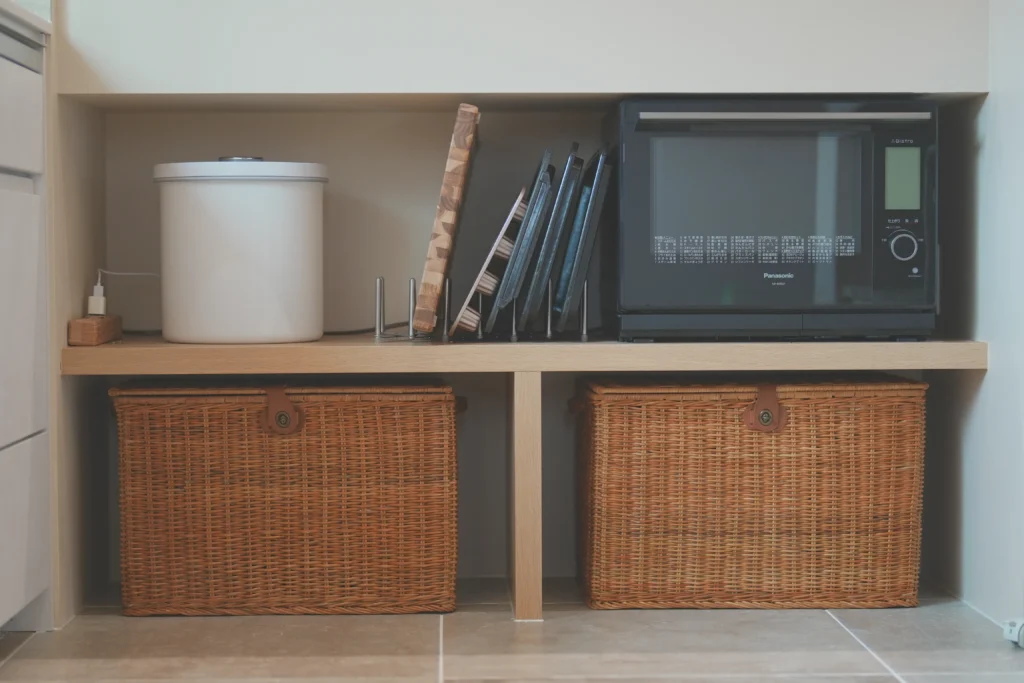
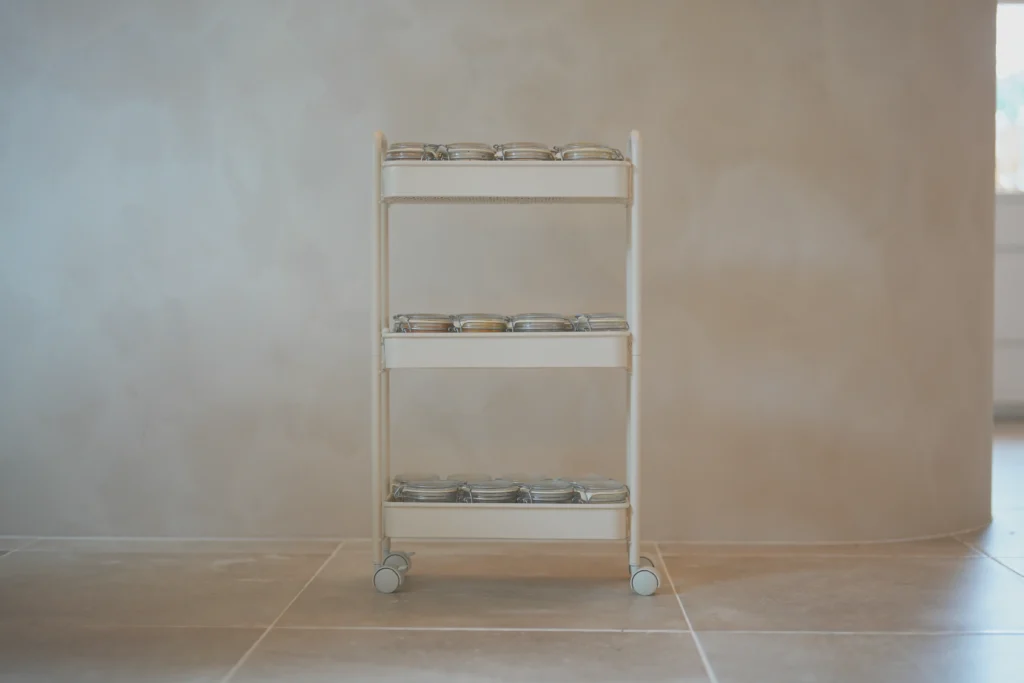
The inside (back side) of our custom kitchen counter is a massive storage area designed to neatly hide our appliances and trash cans.
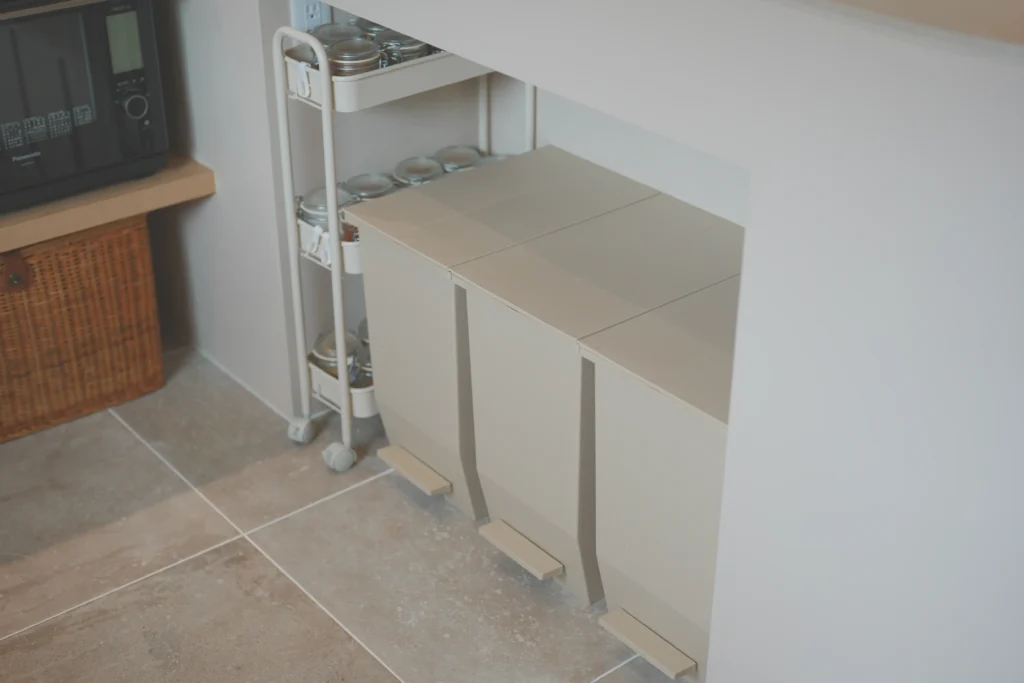
When we lined up three of our favorite “SOLOW Pedal Trash Cans” and a kitchen wagon for spices in the space under the counter… they fit perfectly horizontally without a single millimeter to spare! (It was incredibly satisfying.)
Even better, the limited-edition “beige” color of the SOLOW bins miraculously matched the exact shade of the Porter’s Paints we used on the walls. They blend in so well they look like built-in furniture—that was honestly the most exciting part.
In this roomy storage area, we’ve also lined up our favorite beautifully designed appliances, including a Panasonic Bistro (oven/microwave), a vacuum rice dispenser, and a De’Longhi electric kettle.
The Massive Pantry Behind the Curved Wall
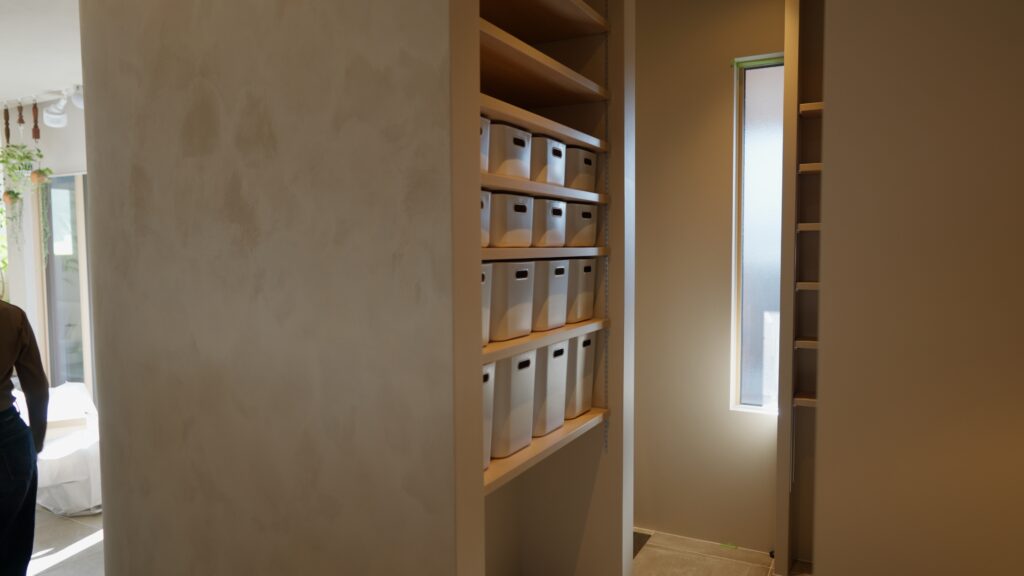
Right next to the kitchen, hidden behind the large curved wall—which is one of the design highlights of our home—is a walk-in pantry of about 3 tatami mats (approx. 5 sqm / 54 sqft).
Shelves with Different Depths
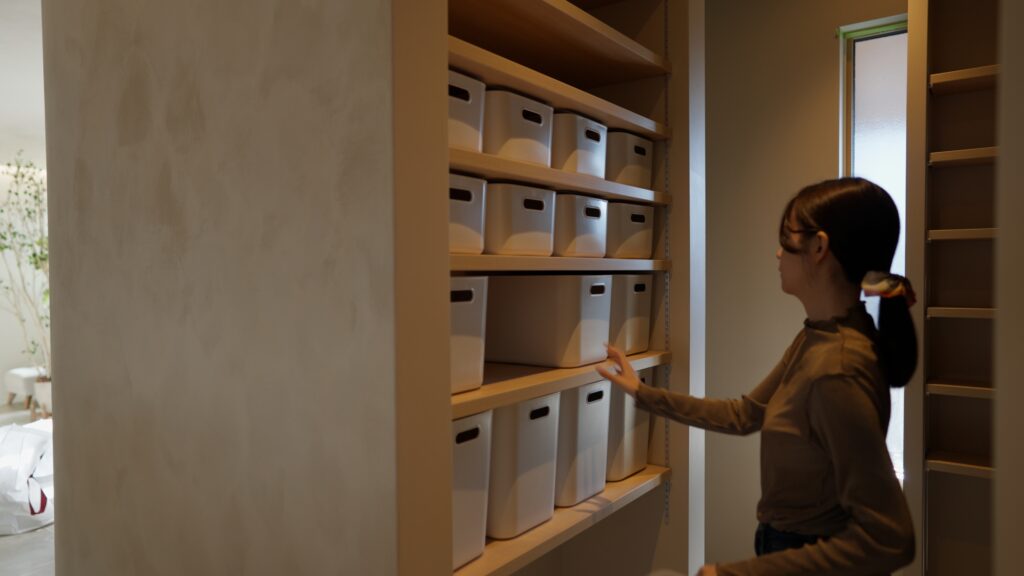
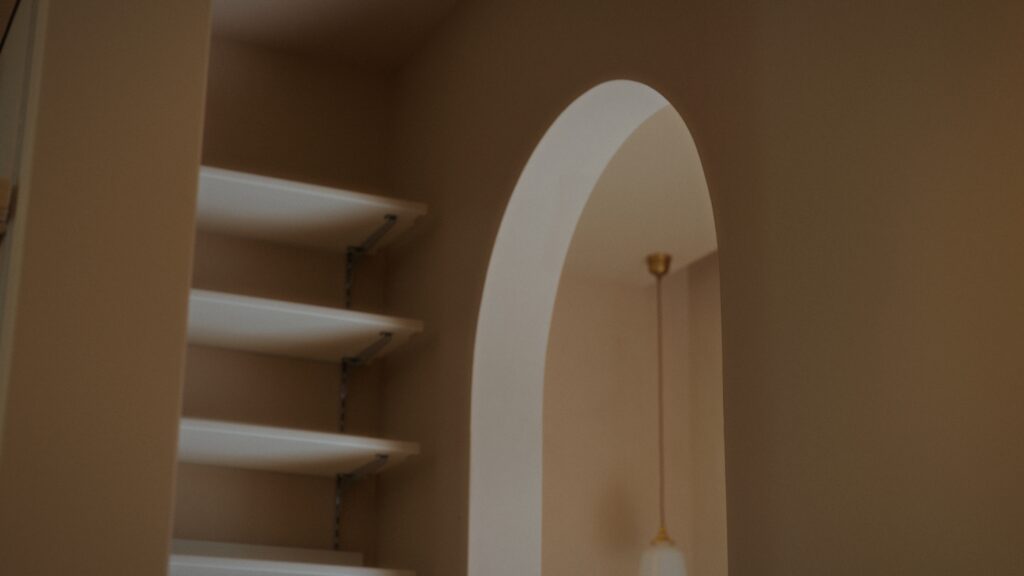
Inside the pantry, we hid the refrigerator and built in two sets of shelves with different depths.
On the 40cm-deep shelves, we lined up Muji storage bins to store our food stock and larger household supplies.
Just like we did when designing the shoe closet, we asked them to start the shelf brackets a bit higher up, leaving a large, open space right at the floor level.
By placing an electrical outlet there, we created a dedicated base (charging station) where our robot vacuum fits perfectly. It diligently heads out to clean every day from a spot that is completely hidden from the living room.
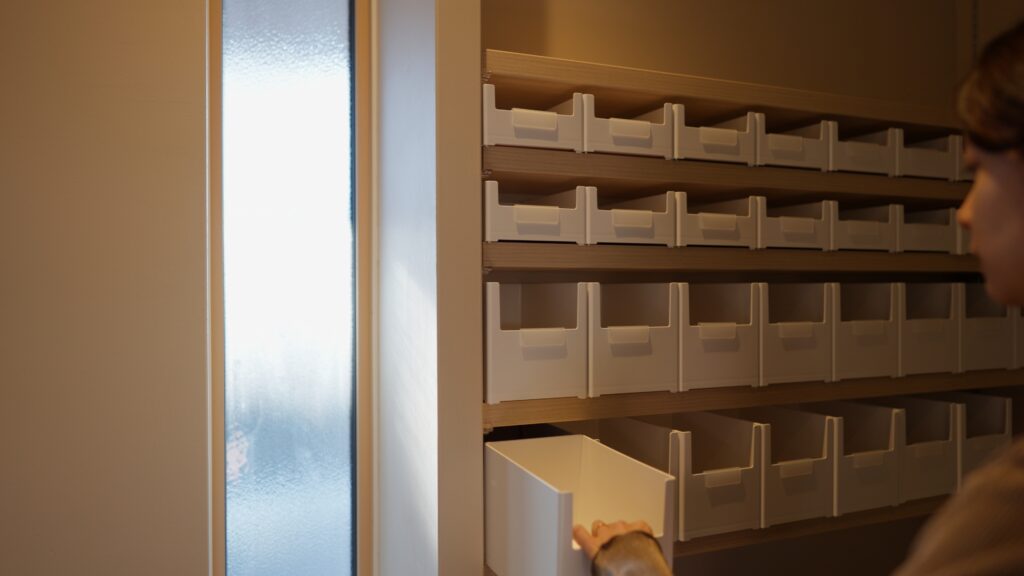
On the other hand, for the shallow, 20cm-deep shelves (built using “Free Back Shelves” with rails on the back), we use storage cases from Cainz.
This is where we store small, miscellaneous items like masks, stationery, and medicine.
In the empty space beneath them, we placed two ivory kitchen wagons from Sanwa Direct (which I also recommended in my “purchases” post!) to organize things like guest glasses and canned goods.
A Convenient Flow Connected to the Entryway
And another detail we obsessed over regarding the pantry is the “flow” of the house.
Actually, the pantry connects directly to the entryway’s shoe closet.
This creates an incredibly functional circular route: when we come home from grocery shopping, we can walk straight into the pantry without passing through the living room, and immediately put groceries away in the fridge or on the shelves.
And that wraps up the four-part room tour of our main living area!
It would make us incredibly happy if the details we agonized over and carefully thought through during our home build could serve as hints for anyone currently planning their own dream home.
\ We Can Introduce Our Home-Building Team! /
If anyone is currently considering building a house with Sumitomo Forestry, we can introduce you to the amazing sales rep, architect, and interior coordinator (IC) who supported our home build.
If you want to work with a highly skilled team, please feel free to reach out via our contact page below!
We also share video room tours and glimpses of our daily life in our Vlogs, so please come visit us there too if you’d like.
Thank you so much for sticking with us until the end!


Comments